![]()
![]()
Once you have created a site group, there are a number of steps you must take to complete the assignment of a site group manager.
Once the user record is created, you must assign the individual to the Site groups XXXXXXXX Managers group. This group was automatically created in the User Manager when you created the site group.
After creating the site group, go to the User Manager.
If the user does not yet exist in the system you must add him/her. Click Add User.
If the user is already in the system, you must edit their existing user record and add the Site Group information to their User Details. See example below.
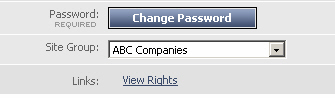
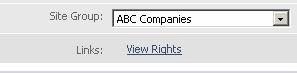
Complete the User Details section. Be sure to select the appropriate Site Group for this user from the Site Group drop-down.
Click Save to save the new user record.
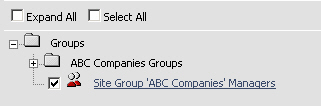
Go to the Groups tab and check the box next to the user group called Site Group 'XXXXXXXXX' Managers. In this example, the appropriate user group is called Site Group 'ABC Companies' Managers.
Click Save.
You can now view the rights that this user has by clicking on the View Rights link (shown below) located in the User Details section of the user record.
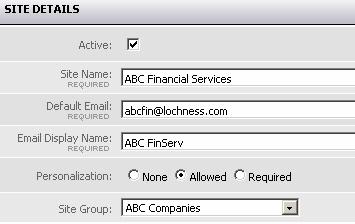
Each time you create a site group you must add a single default site to the group. Create the site as you normally would, but make sure you select the appropriate Site Group in the Site Group drop-down field.
Create a default site. See Creating sites if you are not sure how.
In the Site Details section, be sure you select the appropriate Site Group from the drop-down.
Before allowing the site group manager access to their site group, you must configure their user rights. As the system administrator you can control what each site group manager can see and do within their own site group.
From the System menu, select the Group Manager option.
On the Group Search page, click Search. A complete list of groups is displayed.
Locate the appropriate group with the name in the format Site Group 'XXXXXXX' Managers as illustrated below:
![]()
Click on the group name link to edit the group.
You can add group members but remember anyone added here will have administrator rights to all sites within the given site group. You can also use settings on the Tools tab to control which System functions the site group manager will have access to. The Page types tab allows you to control which page types the site group has access too.
Make desired changes to the access rights for this group and click Save.
The site group manager can now use the URL of the default site you created to log onto and begin working with their site group. They can create sites, manage users and perform all functions that a System Administrator would when managing sites.
Once you have created the site group manager user, added a default site, and edited the access rights for the site group manager, you can proceed to give them the information they need to log on and start managing their site group.
You must give the site group administrator:
the URL for the Home page of the default site you created for their site group
their logon user id and password
Important: This is the point at which the job of managing the site group is handed over to the site group manager. They will need to create their users, user groups, workflows etc. within the limitations you as the system administrator have imposed for their particular group of sites. They can start with the site setup checklist if they need information on how to get started setting up their sites.